Jhoose Security Module v3.3 – Page-Level Overrides and IP Restrictions
Override CSP and Permissions Policy per page, and lock down Optimizely sites with an IP allow-list, path and header bypasses. New in Jhoose Security v3.3.
In v3.0, I introduced hierarchical configuration so you can manage security settings globally and override them per site. Since then, I've added CMS 13 support, and the latest release adds an additional level of hierarchy, with page-level overrides for the Content Security Policy and Permissions Policy. It also adds a new IP Restrictions feature for locking a site down to a known set of addresses.
Both features shipped in 3.3.0. The current release is 3.3.4, which adds reporting fixes on top of that.
On this page
1. Page-Level Overrides
Site-level configuration covers most scenarios, but there's always one page that needs something different. Typical examples include a campaign landing page with an embedded third-party widget, a page hosting a video call component that needs camera access, or an external JavaScript widget that's only used on a single page.
Until now, the only options were to loosen the policy for the whole site or to write custom code. Neither is great. Loosening the policy weakens protection everywhere, and custom code is one more thing to maintain.
1.1 How the hierarchy works
Page overrides sit at the top of the existing inheritance model:
Global default → Site policy → Page override
A page override takes priority over the site policy, which in turn takes priority over the global default. You only override the directives that need to differ. Everything else continues to be inherited.
1.2 Managing overrides from the editor
I wanted editors and developers to manage this in context, without going back into the admin interface. Two new commands are available in the on-page (all properties) editor's toolbar menu:
Jhoose CSP Page Override
Jhoose Permissions Policy Page Override
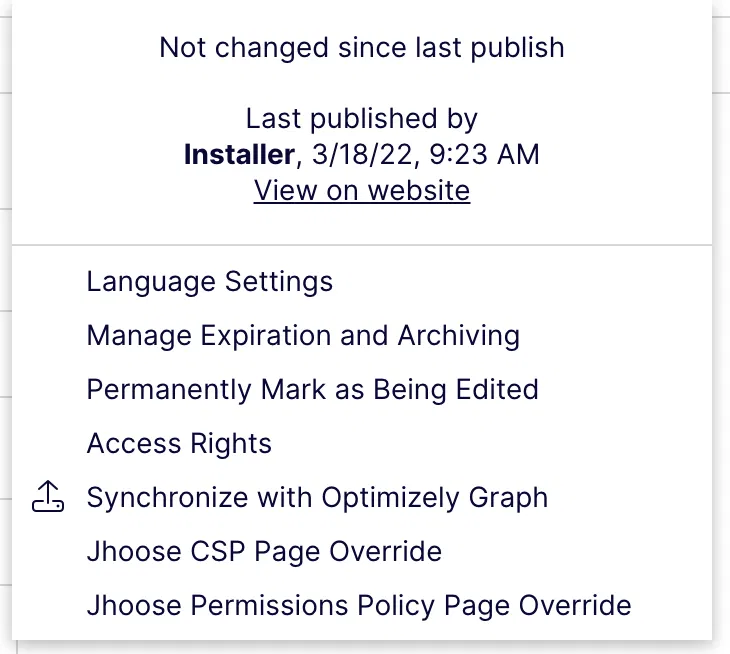
The two new override commands in the Optimizely editor toolbar menu.
1.3 CSP page overrides
The CSP dialog lists the directives that are overridden for the current page. Use the Add a policy override… dropdown to add a directive. The sandbox directive is supported here too.
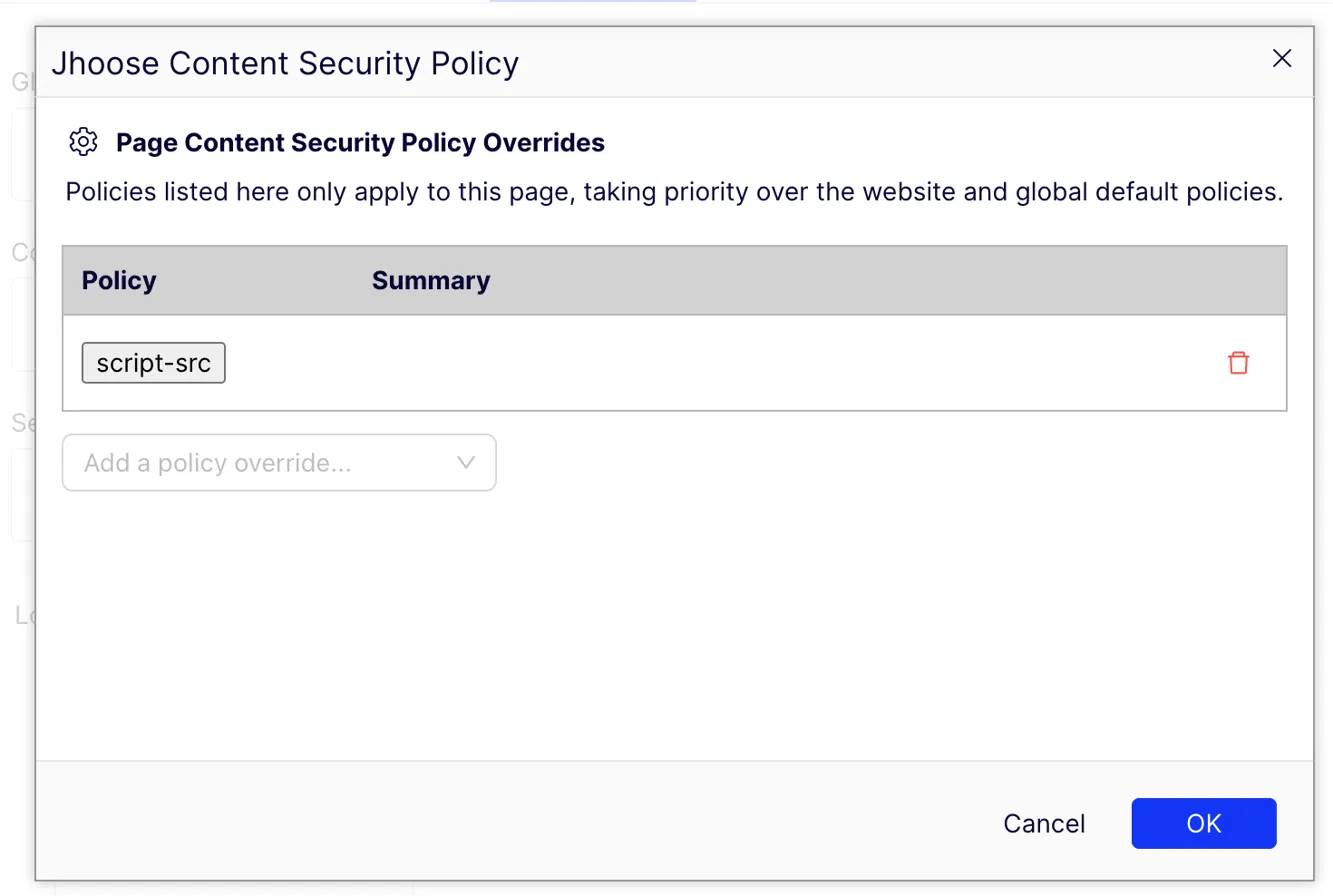
Page-level CSP overrides – only the listed directives differ from the site policy.
Each directive is edited with the same options as the site-wide CSP editor: source keywords, schema sources, host sources and report-only mode. In this example, script-src is extended with blob: for this page only:
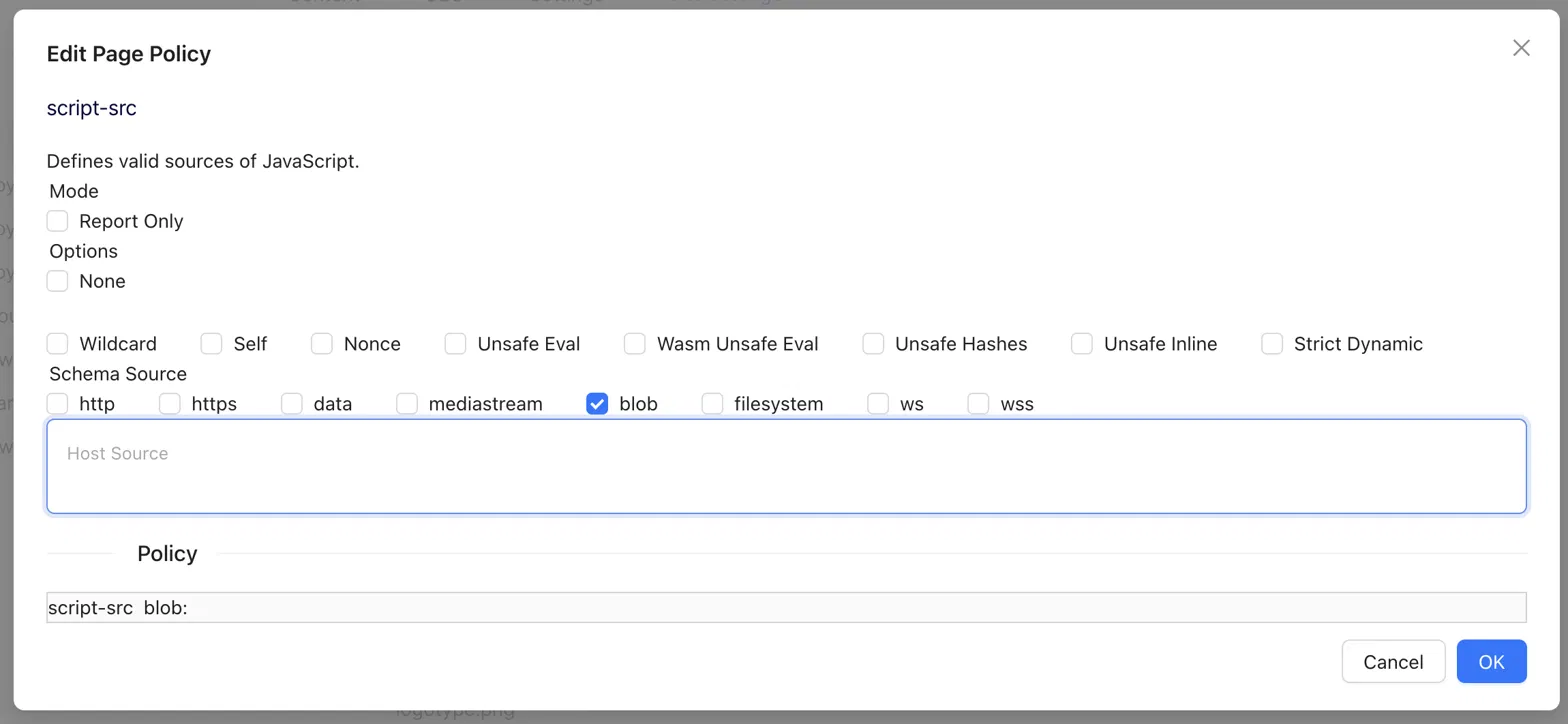
Editing script-src for a single page – the generated policy is previewed at the bottom.
1.4 Permissions Policy page overrides
The Permissions Policy dialog works in the same way. Each permission is configured with the same Mode (Default / Enabled / Enabled (Report Only) / Disabled), Scope (Self / All) and Allowlist options as the site-wide editor.
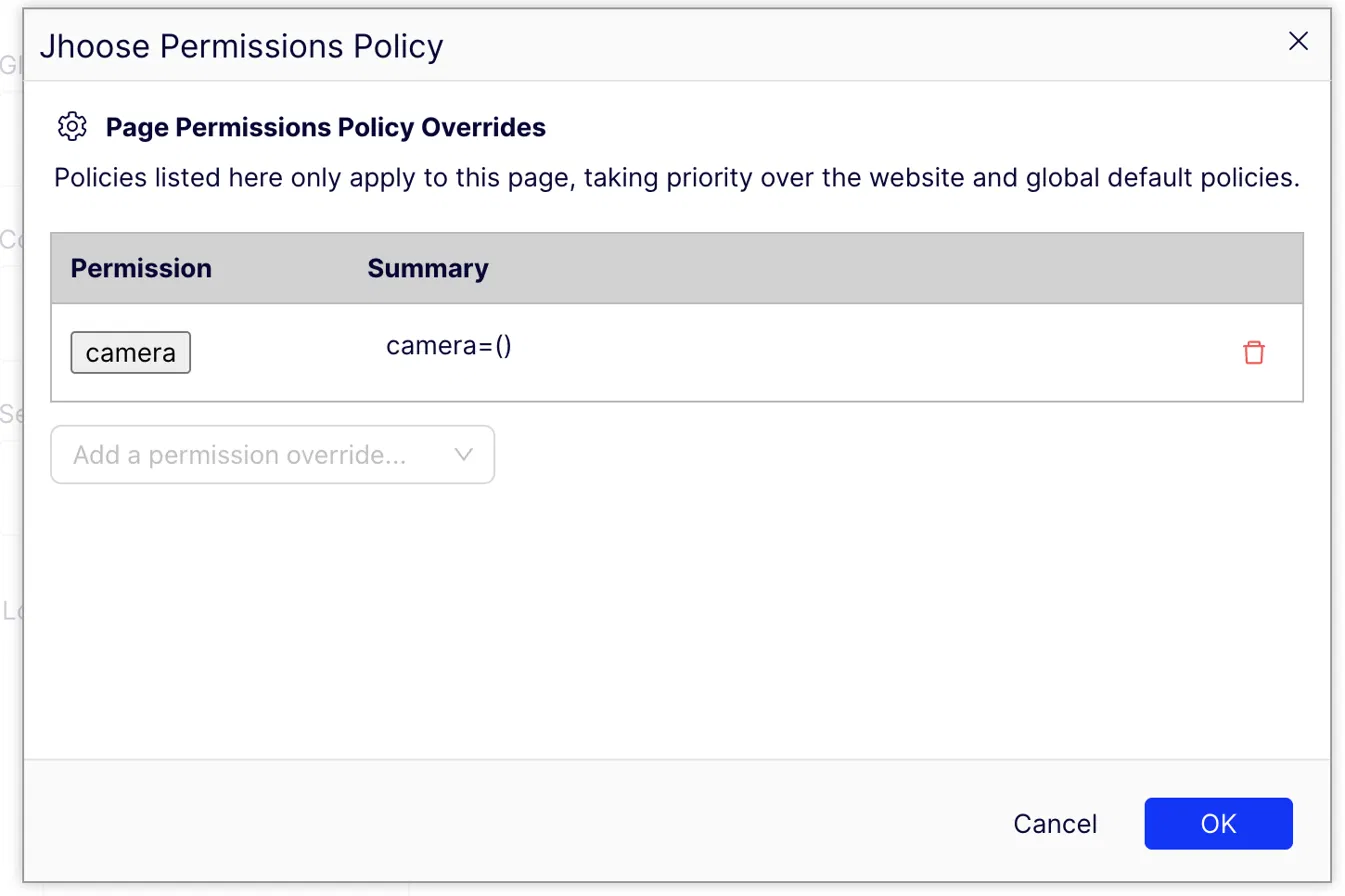
Overriding the camera permission for a single page.
Changes are only applied when you click OK. Cancelling or closing the dialog discards any unsaved changes.
2. IP Restrictions
This feature has come up repeatedly on projects. A site needs to be locked down during pre-launch UAT, a staging environment shouldn't be publicly reachable, or edit mode should be accessible only from the office or VPN. These are usually solved at the WAF or CDN level, but that isn't always available or quick to change. Having it inside the CMS, managed alongside the rest of the security configuration, makes life easier.
IP Restrictions is an allow-list. Visitors whose address isn't on the effective list receive a 403 Forbidden response.
It has its own admin screen under CMS > Security > IP Restrictions, with three tabs:
IP Addresses
– the allow-list itself
Ignored Paths
– path prefixes that bypass the check
Ignore Headers
– header name/value pairs that bypass the check
2.1 IPv4, IPv6 and CIDR ranges
The allow-list accepts IPv4 and IPv6 addresses as well as CIDR ranges in both formats:
203.0.113.10 198.51.100.0/24 2001:db8::1 2001:db8:abcd::/48
You can paste multiple entries at once, separated by spaces, commas or new lines. This is handy when copying a list from a firewall config or a network team's email.
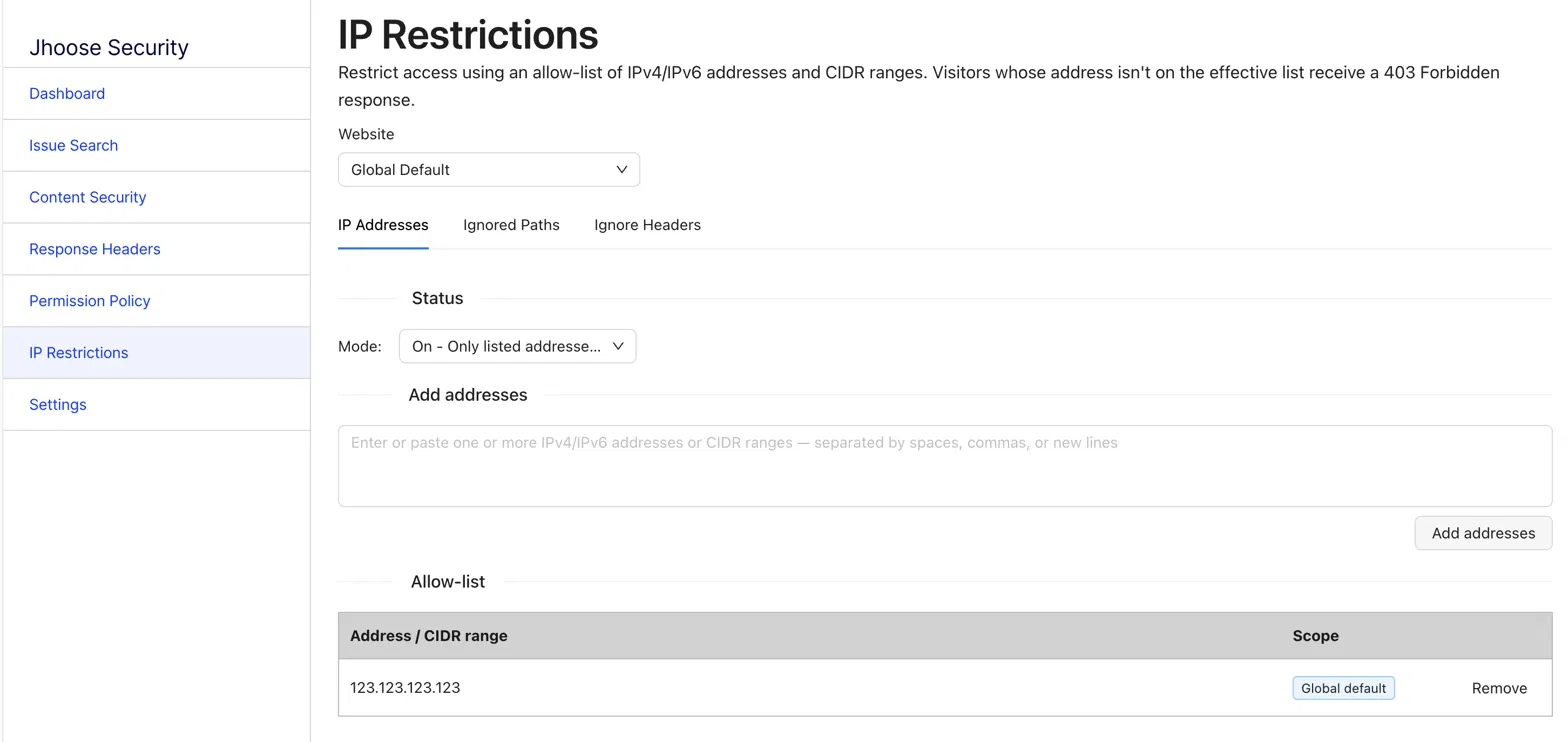
The IP allow-list, managed at the global level.
2.2 Global and site-level configuration
IP Restrictions follow the same model as the rest of the module. Use the Website selector at the top of the screen to switch between the global default and an individual site.
Mode
– enforcement is off by default. You can turn it on globally, and each site can override the mode. A site with no override falls back to the global mode.
Entries
– entries on all three tabs can be scoped globally or to a single site. Global and site entries are
additive; a site always sees the global entries plus its own.
For example, you can put your office and VPN ranges in the global list and add a client's office range only to their site.
One thing to be aware of: the mode is stored in the module's settings in the database, not in appsettings.json. It's managed through the admin UI, or through Import / Export if you're moving settings between environments.
2.3 Ignored paths
Some endpoints must stay reachable regardless of the caller's address. Health checks, monitoring probes and inbound webhooks (Stripe, for example) rarely come from a fixed IP.
Ignored paths are matched by prefix and are segment-aware. /health matches /health/live but not /healthcheck.
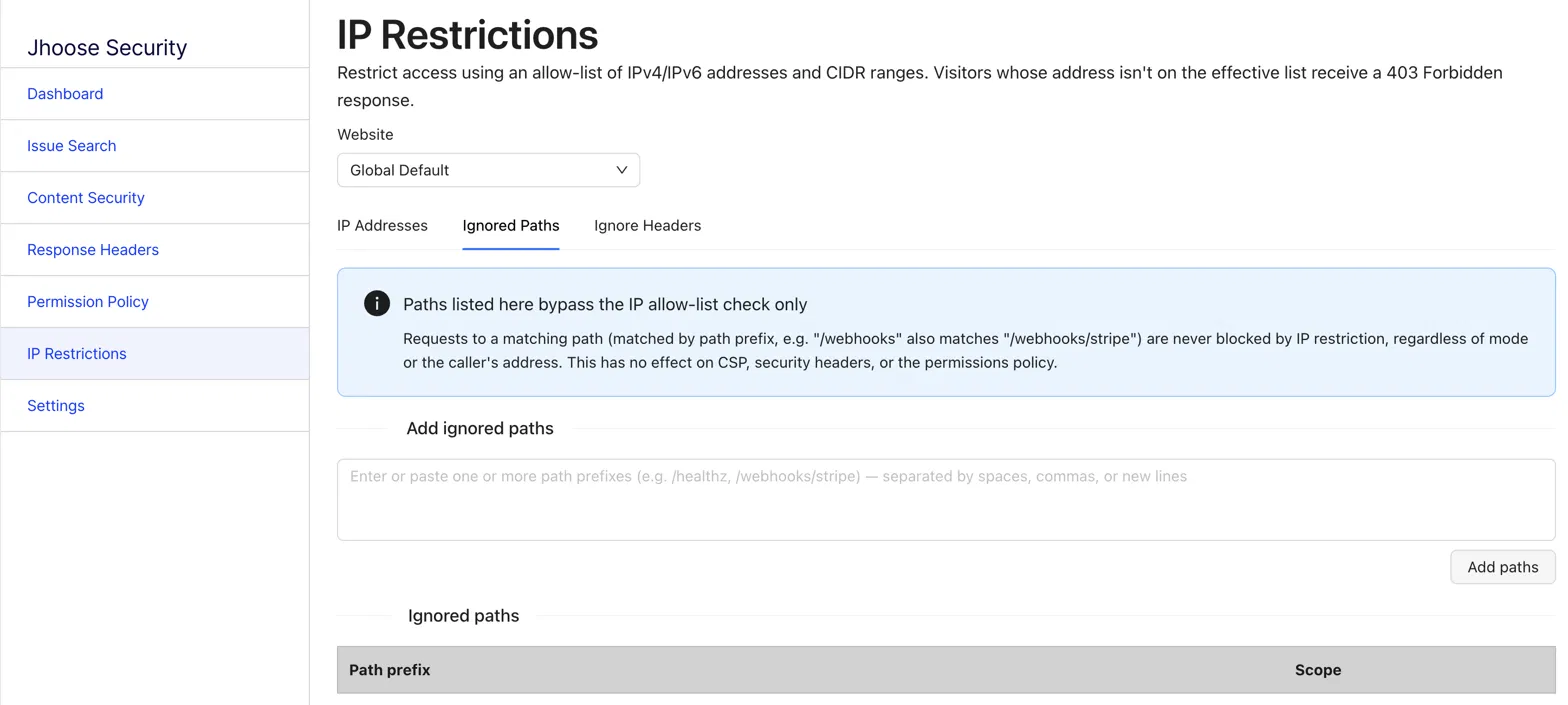
Paths listed here bypass the IP allow-list check only.
Ignored paths only affect IP Restrictions. CSP, the security headers and the Permissions Policy are still applied to those requests.
2.4 Ignored headers
Ignored headers cover callers that can't be pinned to a stable IP but can send a shared-secret header, such as CI/CD pipelines, synthetic monitoring or internal services. If a request carries a header whose name and value match an entry, the allow-list check is skipped. Matching is case-insensitive on both the name and the value.
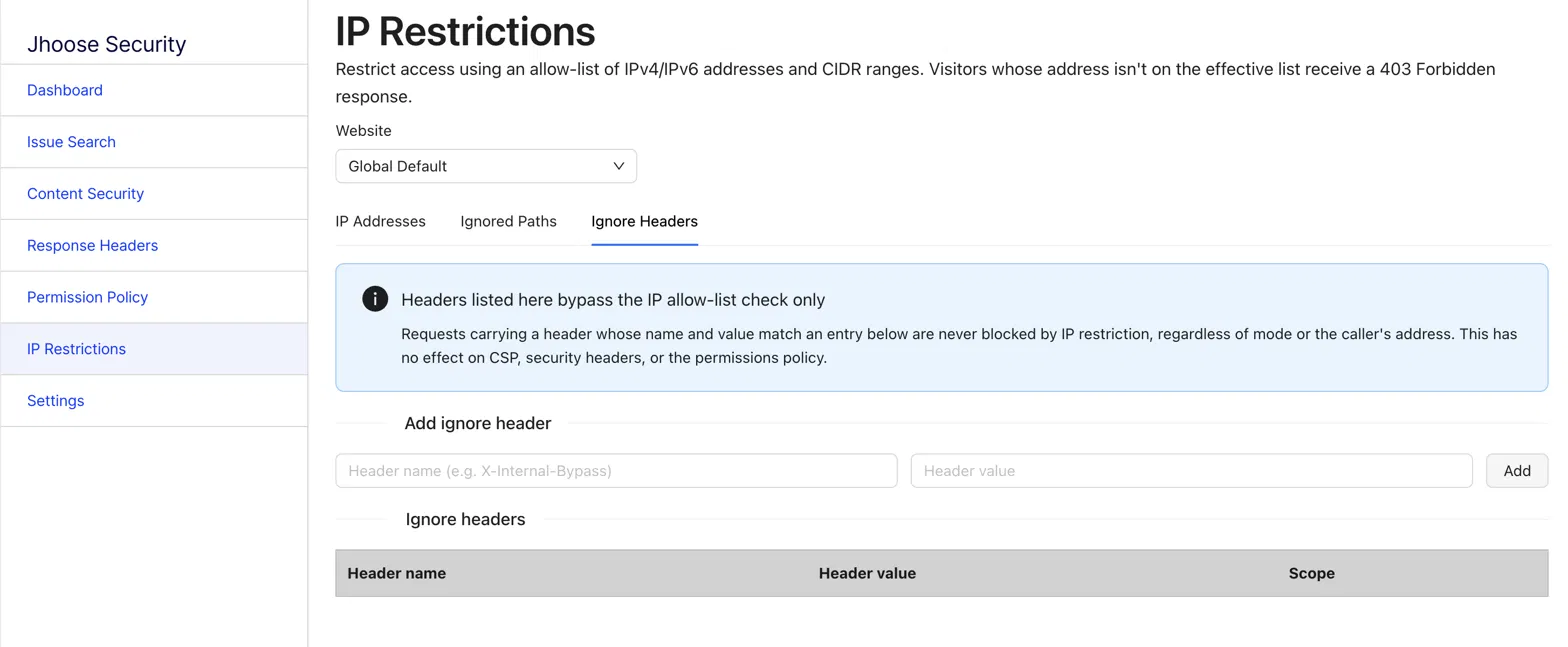
Header name/value pairs that bypass the IP allow-list check.
For example, a deployment smoke test might call:
curl -H "X-Internal-Bypass: 7f3c9e1a-…-long-random-value" https://staging.example.com/
Treat these values as secrets. Anyone who knows the name/value pair can bypass the allow-list entirely, so use a long random value, keep it out of source control, and rotate it if you think it may have leaked.
2.5 Choosing what's protected
IpRestrictionScope controls which part of the solution the allow-list applies to. It's part of JhooseSecurityOptions, so you can set it in code:
csharpservices.AddJhooseSecurity(_configuration, (o) => { o.IpRestrictionScope = IpRestrictionScope.PublicSite; });
or in appsettings.json:
json"JhooseSecurity": { "IpRestrictionScope": "PublicSite" }
Value | Behaviour |
|---|---|
| IP Restrictions are bypassed entirely, whatever the admin UI says. |
| Enforced only outside |
| Enforced only inside |
| Enforced everywhere. |
ExclusionPaths is the same list used to exclude CSP and security headers. It defaults to /episerver, /optimizely and /api/jhoose. If you use PublicSite and have other admin modules installed, add their paths so they aren't treated as part of the public site:
csharpservices.AddJhooseSecurity(_configuration, (o) => { o.ExclusionPaths.Add("/commercemanager"); o.IpRestrictionScope = IpRestrictionScope.PublicSite; });
With CmsSite the logic flips. Anything in ExclusionPaths becomes restricted rather than exempt, which is usually what you want if the goal is to lock down edit mode.
2.6 Order of evaluation
For each in-scope request, the middleware checks:
Does the path match an
ignored path
? → allow
Does the request carry a matching
ignored header
? → allow
Does the caller's IP match the
allow-list
? → allow, otherwise
403 Forbidden
2.7 A note on proxies
The client IP is taken from the left-most entry in X-Forwarded-For when the header is present, otherwise from the connection's remote address. Only rely on this when the header is set by a proxy, load balancer or CDN you control. Otherwise, a caller can spoof it.
3. Other Fixes in 3.3.2
The 3.3.2 release also tidies up reporting:
Added support for
potential-permissions-policy-violationreports.intervention,crashand other unsupported report types are now dropped.Fixed an issue with
Permissions-Policy-Report-Only.Fixed report parsing in some scenarios.
Updated the migration documentation.
4. Upgrading
Both packages receive the same features, so update whichever one matches your CMS version:
CMS 12 dotnet add package Jhoose.Security.Admin CMS 13 dotnet add package Jhoose.Security.Admin13
If you're coming from 2.x, follow the v3.0 upgrade steps first. The database structure changed in 3.0, so export your settings before upgrading and import them afterwards.
Closing Thoughts
Page-level overrides close the last gap in the configuration hierarchy, and IP Restrictions is something I've wanted on several projects. Having it inside the module saves a trip to the WAF for simple scenarios.
As always, I'd love to hear how you're using the module. Feedback, issues and pull requests are all welcome on GitHub.
Further reading
Jhoose Security Module v3.0 – Site-Level Security Configuration
Jhoose Security Module – Optimizely CMS 13 Support
Jhoose Security v2.6.0 – Permissions Policy and .NET 10