
Integrating Optimizely DAM with Your Website
This is the second post in a series I am writing about Optimizely DAM. In this post, I will demonstrate how to integrate the DAM with your website. If you are interested in the features of the DAM, please read the first article: Exploring Optimizely DAM Features for Content Marketing.
Getting Started
Integrating Optimizely DAM with Optimizely CMS is straightforward. Install the nuget package:
1dotnet add package EPiServer.CMS.WelcomeIntegration.UIThen add the following code to your startup:
1services.AddDAMUi();For more detailed information, please refer to the Optimizely website: CMP DAM Asset Picker in CMS.
Once completed, you can select assets from the DAM and use them within your website. At this point, we still face 3 challenges
The image selected by the editor is probably not optimised for the web, and will cause performance issues.
We don't have access to the metadata, so we can't use the AltText from the DAM.
We don't have access to the renditions.
Some of these issues could be addressed by placing the responsibility on the editor to choose the best image, but I feel there is a better approach.
Optimizely has created a tag helper to get the metadata (CMP DAM Asset Picker in CMS), but I believe that this uses the CMP RestAPI, which is rate-limited, so I would expect this to cause performance issues on your website.
Digital Asset Transformation (DAT)
To help address performance issues, you can dynamically resize images. This is simple and handled by the CDN; once resized, the CDN will return a cached version.
?width=500&height=500
More information is available on this page: Dynamically resize images from the Optimizely CMP API.
Dynamically transforming the images does solve some of the issues above, but I feel that this still leaves us with issues:
The image format cannot be converted.
The initial transformation does take some time and causes flicker.
We still don't have access to either the metadata or the renditions.
Enter the Graph
In the previous two approaches we have relied on the editor choosing the best version of the image, and then using dynamic transformation to resize it. The ideal approach would for the editor to choose the image, then let the code work out the best rendition to use.
Although it's not well publicised, the DAM has a GraphQL endpoint that you can use. This endpoint gives you access to the core asset data, metadata, and renditions.
Speak to Optimizely about getting this enabled for your instance.
Approach
The editor still chooses the image from the DAM, but then:
Get the asset information from Graph, which includes the metadata and the renditions.
Programmatically choose the best rendition.
Use DAT to resize the image to the exact dimensions.
Renditions
If you create a rendition for each image dimension requirement required by your site, you will create a lot, which becomes difficult to manage over time. Instead, I would focus on creating renditions for the different aspect ratios. I also set the format to WEBP (lossy compression) for every rendition.
Code Examples
The code examples below walks through my approach to integrating with the DAM and using optimised images on the website.
Configure image Dimensions
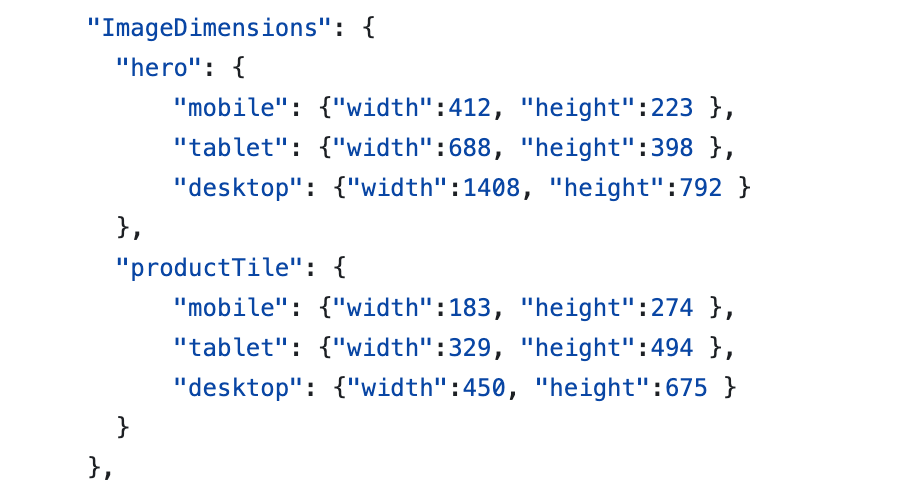
In the appSettings.json I have a section that defines all the different image requirements.
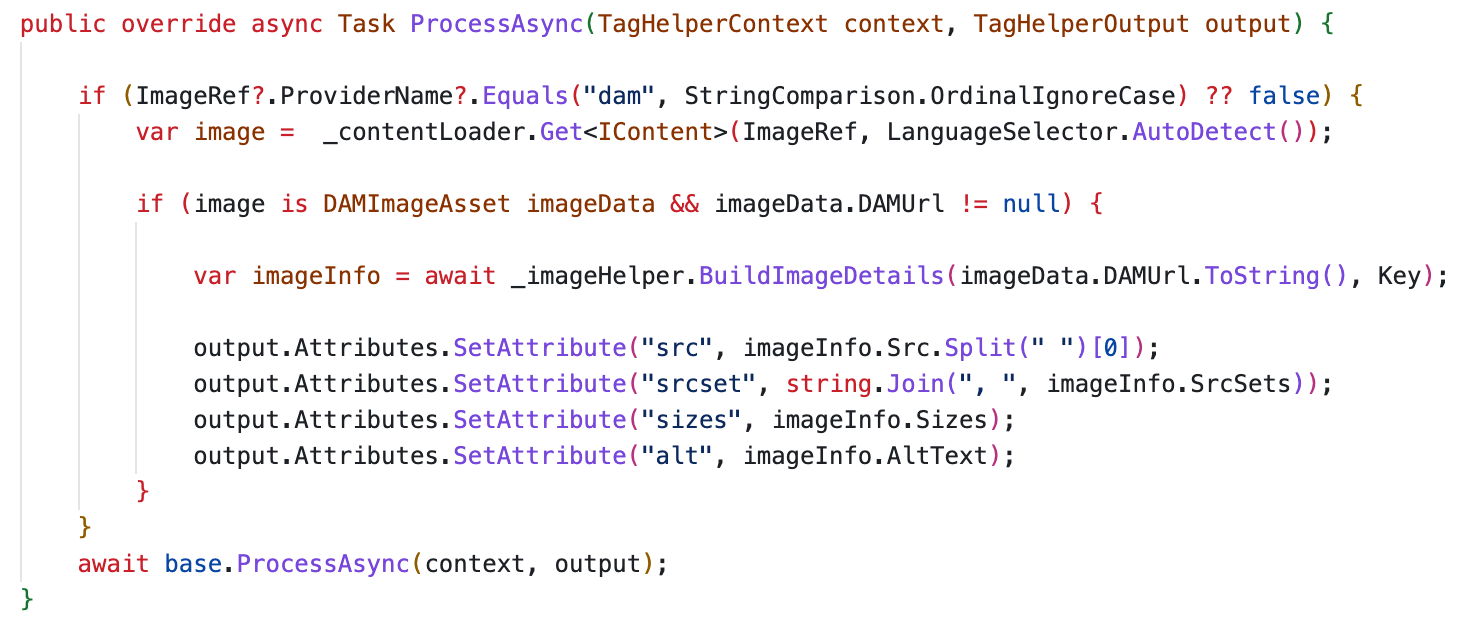
Custom taghelper
I developed a custom tag helper that extends the standard image tag with two new attributes:
key - This links it to the settings in the appSettings.
image-ref - This is the content reference for the DAM image.
The code checks that the referenced content is from the DAM; if it is, it uses the registered IImageHelper to get the correct renditions.

Example demonstrating using the new attributes on the image tag.
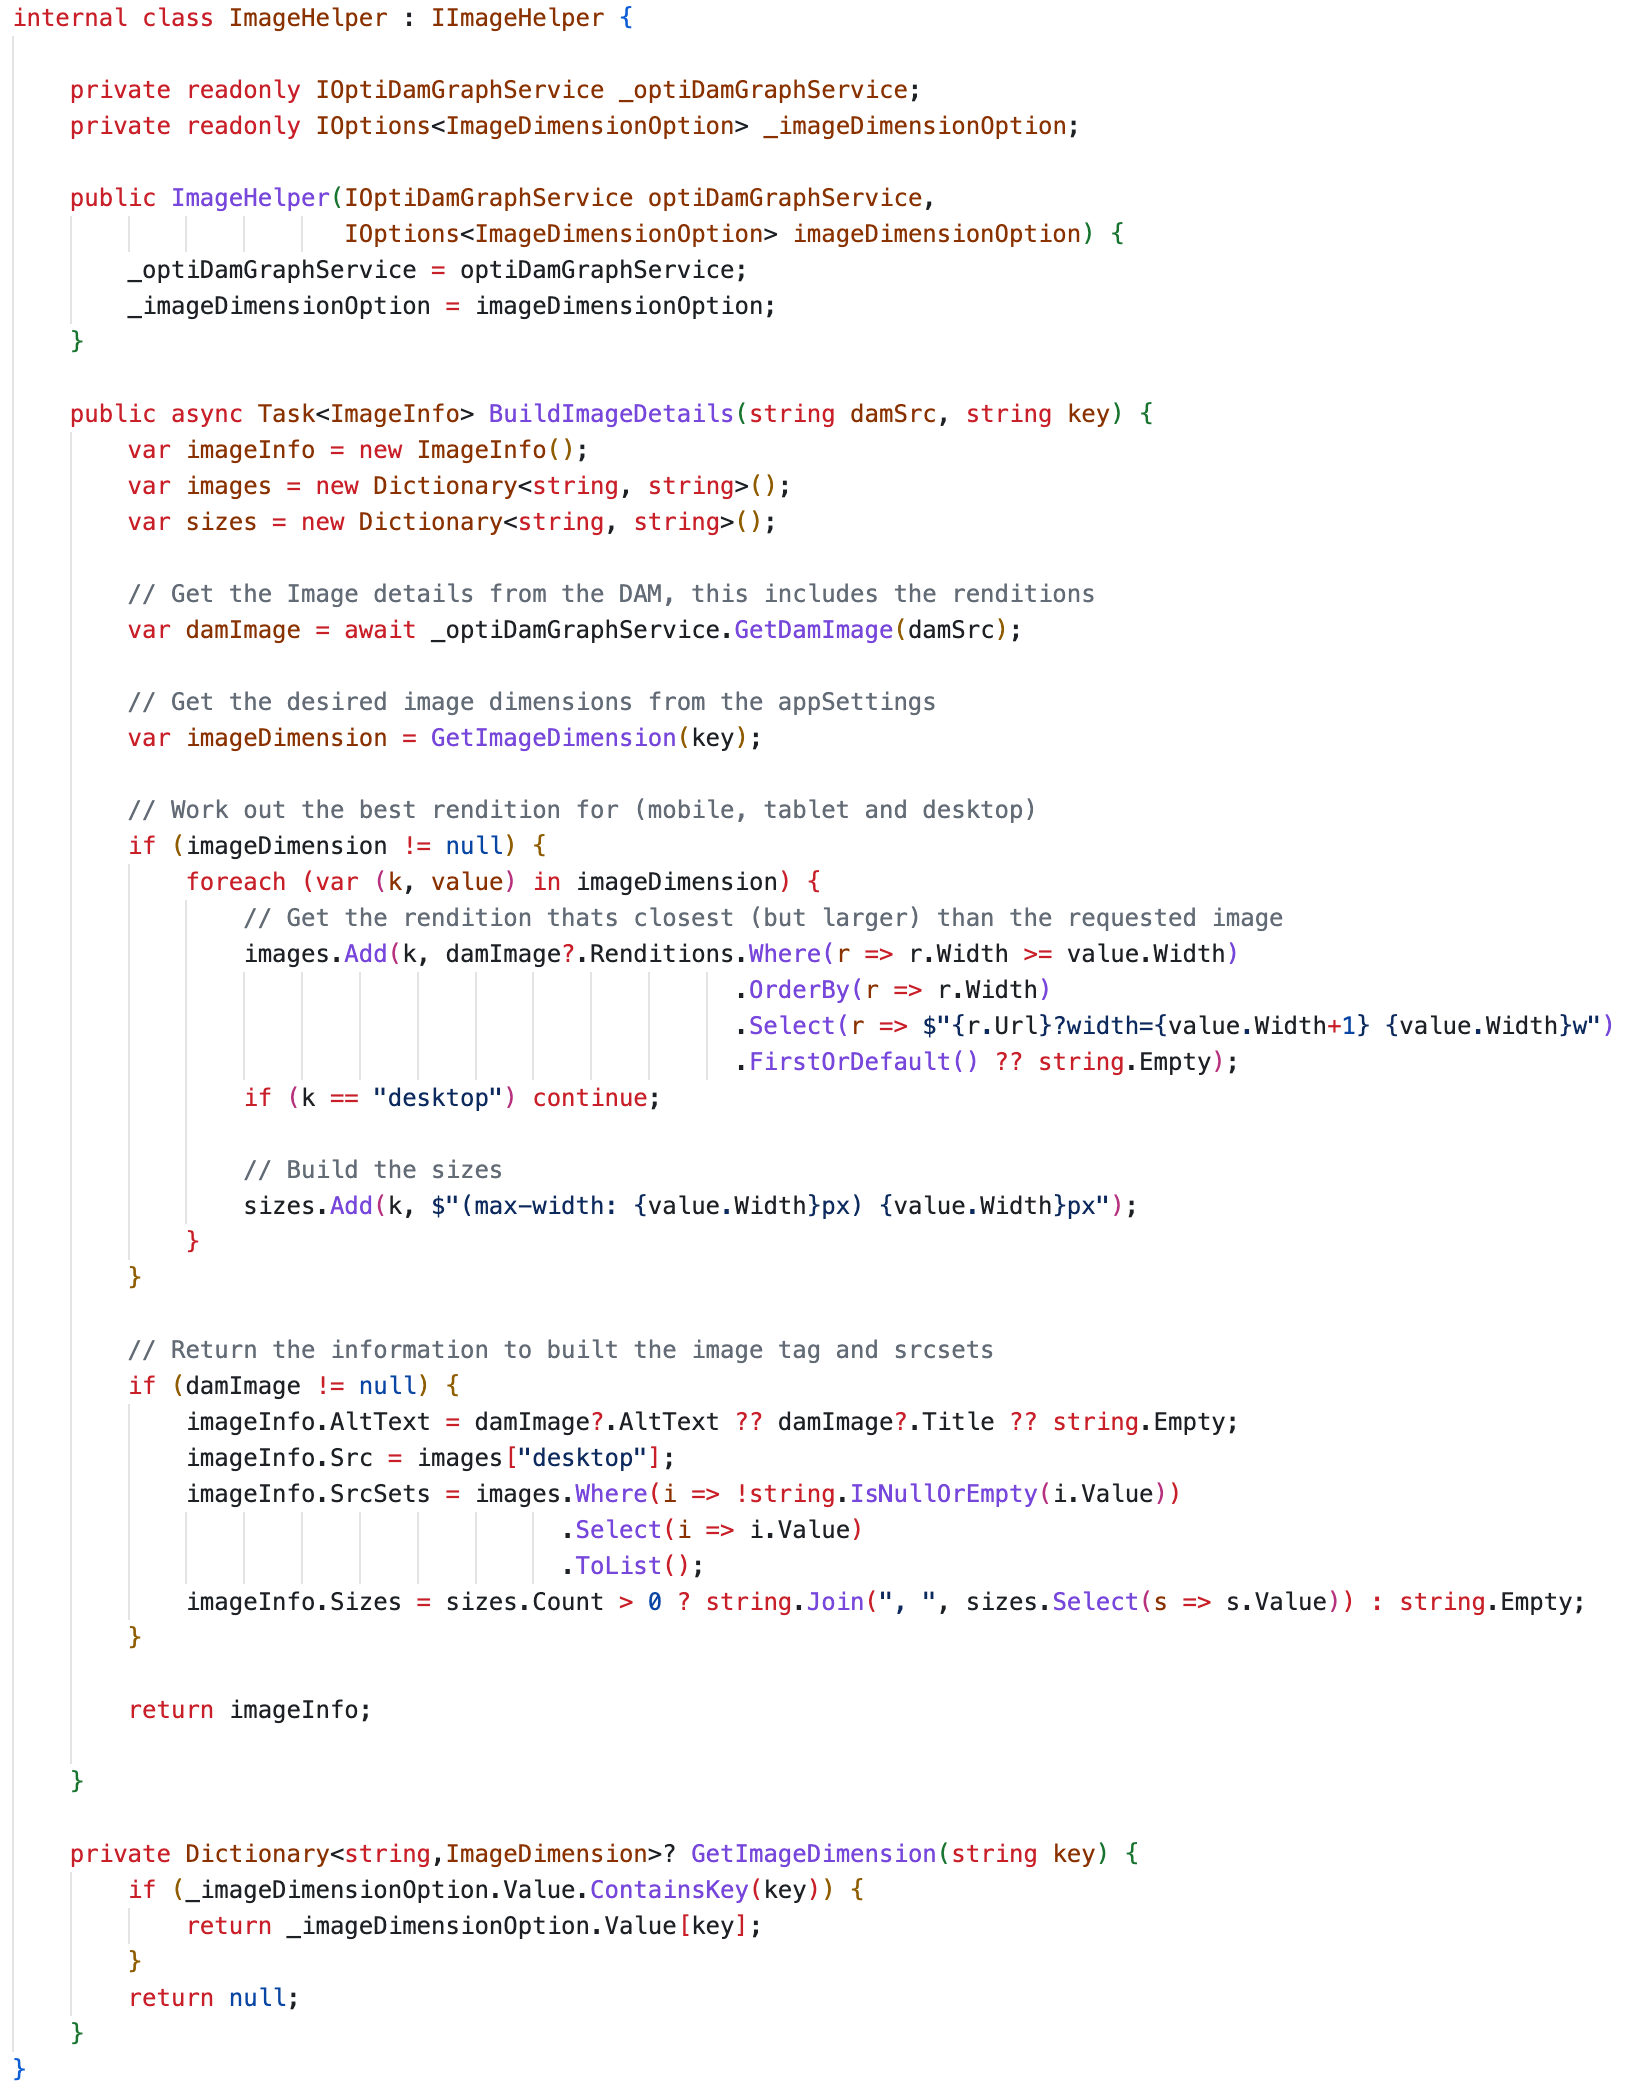
IImageHelper
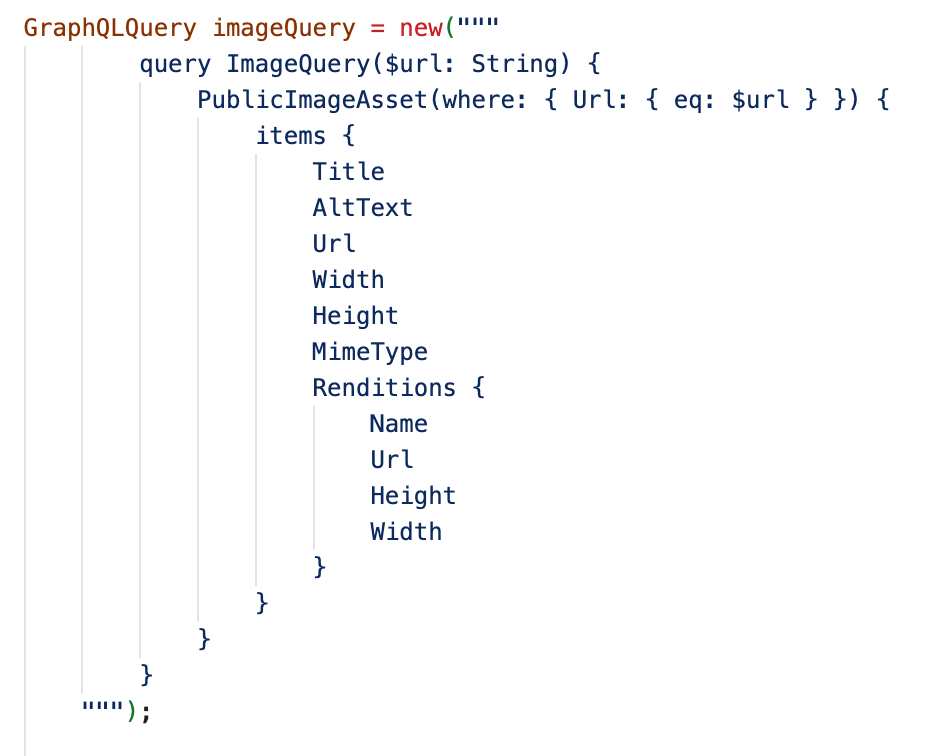
The code below gets the rendition information from the DAM Graph and calculates the best renditions for the requested image sizes.
The logic used in the example below needs to be improved. It doesn't get the best image for the aspect ratio, but you must develop the logic to serve your specific requirements.
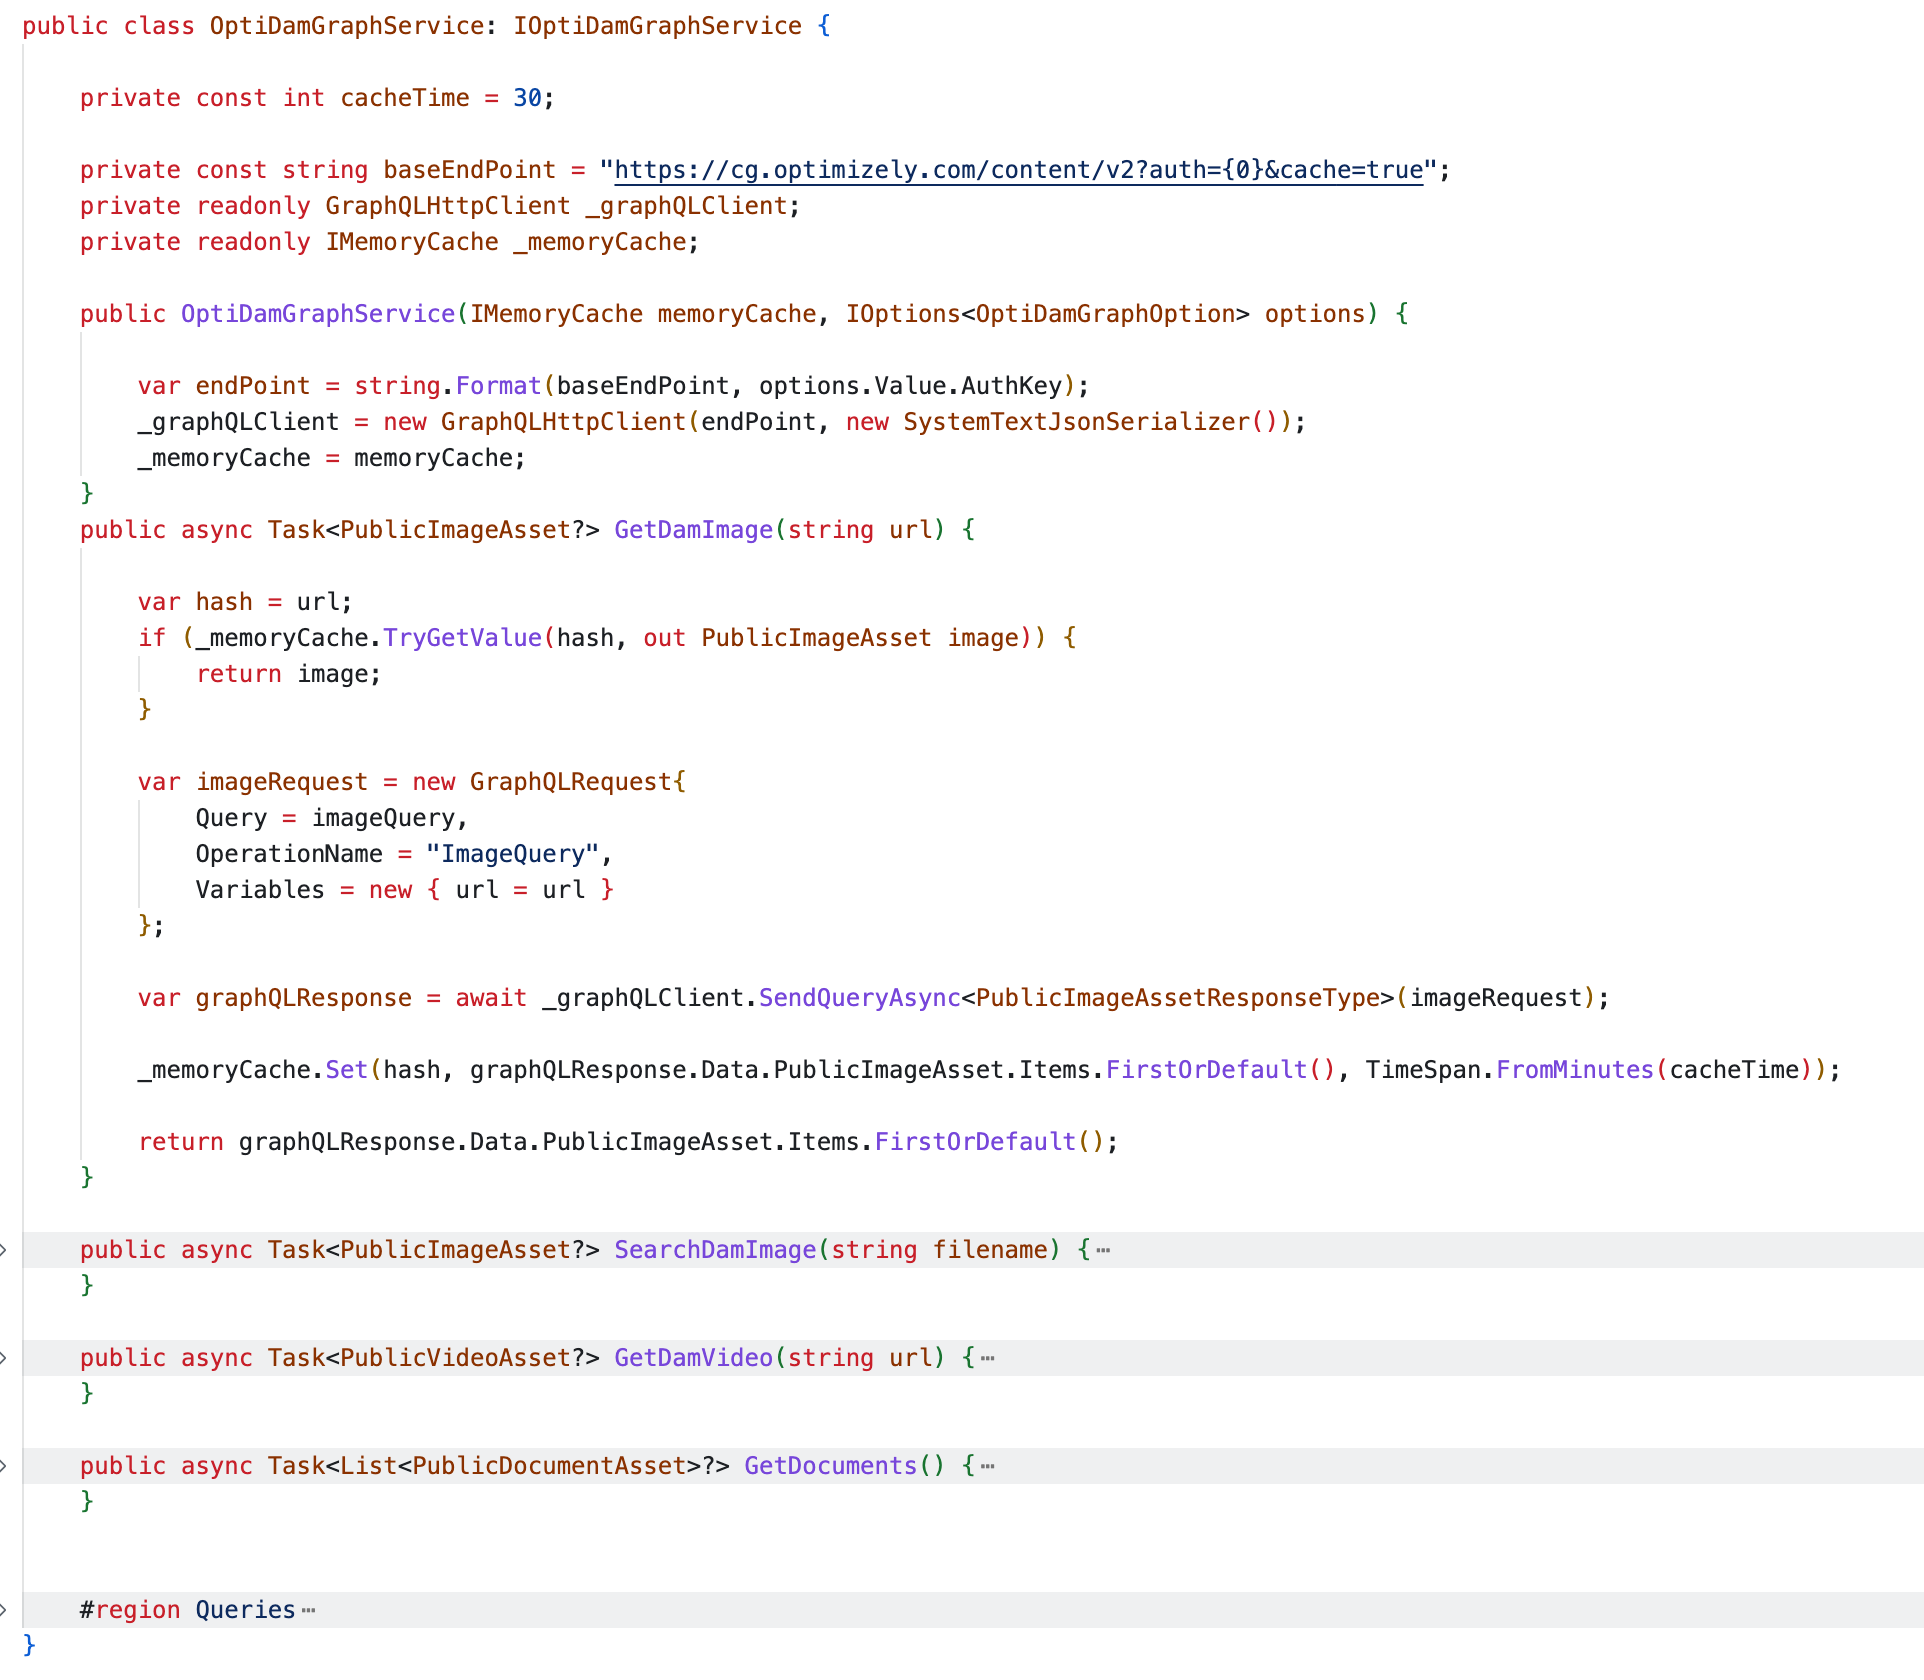
IOptiDAMGRAPHService
This service is responsible for querying the DAM and returning the image information, including the renditions and Alt-Text. I am also caching the response, which helps reduce the number of network requests.
Github Repo
I have created a solution to demonstrate the integration approach, you are free to take this code and use it within your own projects: https://github.com/andrewmarkham/Opti-Dam
The solution contains two projects:
A version of the 'Foundation' demo site that I have modified to use images from the DAM (Note: not all images have been updated)
OptiDAM - This project contains all the code examples and some additional ones.
A video tag helper
A scheduled job to upload assets to the DAM
A scheduled job to update the image content references on all the products to reference the equivalent images within the DAM.
Both of these scheduled jobs are good examples of using the REST API.
Conclusion
Hopefully, this blog post demonstrates how easy it is to integrate with the DAM, and the code in the repo proves useful to development teams.
One more thing
While presenting at Opticon for the OMVP summit, several people mentioned using Cloudflare Edge image resizing. Up until that point, I hadn't even considered it, as I assumed that this would only work for images hosted in the DXP. I wasn't aware that you could pass the service external URLS.
I believe that using the Edge resizing in addition to the renditions from the DAM is a combination worth investigating. The renditions would provide the images that are cropped using the focal point width.