
Exploring the Optimizely GraphQL API to deliver a high-performing static site - Part 1.
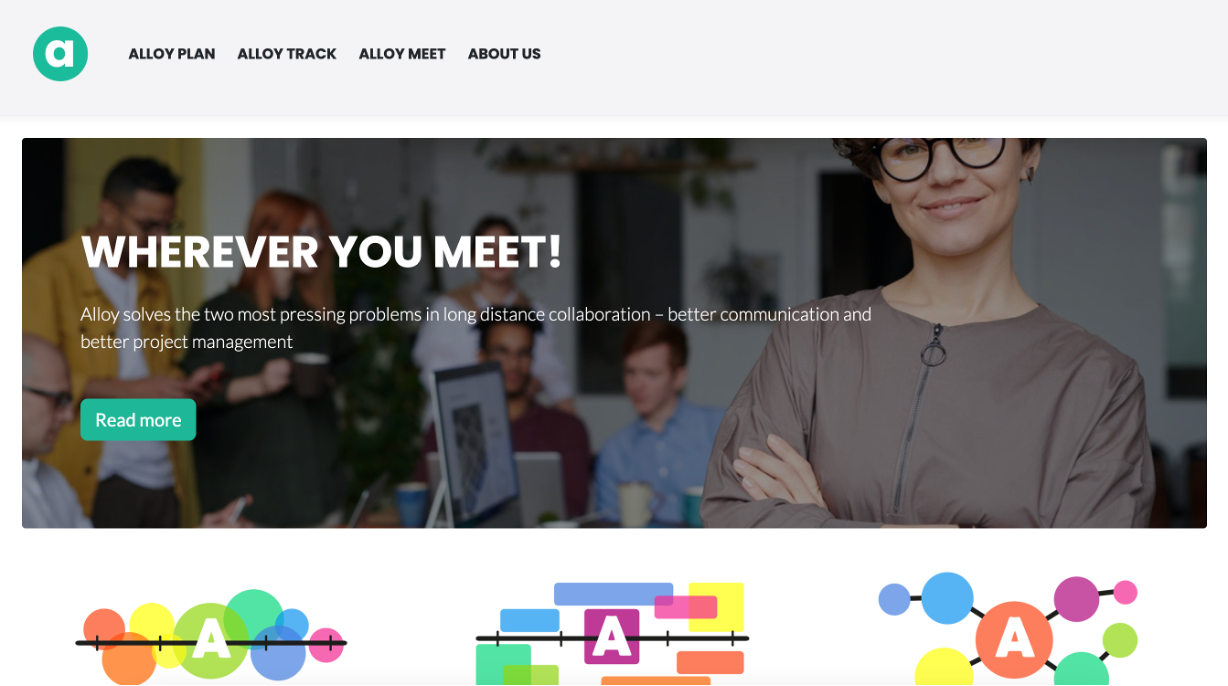
In this series of articles, I will demonstrate how to deliver a site using Optimizely, Next.js and Vercel. In this first instalment, I am focusing on creating a simple POC where I reproduce a simplified version of the AlloyTech website, but statically generated using Next.js and Vercel.
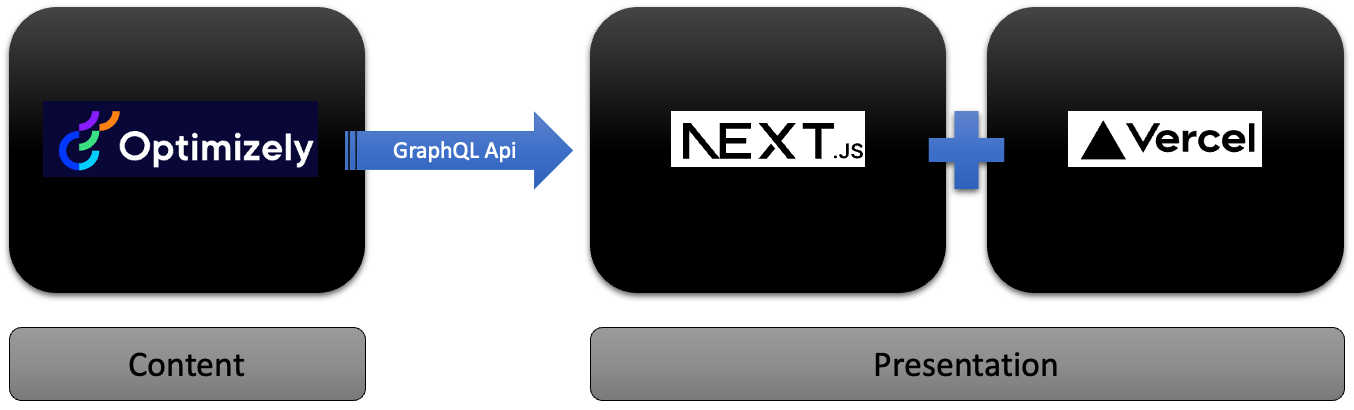
Solution Architecture
Optimizely is used to manage the content, with any content updates synced to the Content Graph.
The presentation layer is developed using Next.js, a React framework. Next.js can generate either a static site at build time, handle server-side rendering, or a combination of both.
Vercel is a global hosting network. The content is cached around the world.
Step 1 - Managing the content
The first step is straightforward, and once complete, you will end up with an instance of AlloyTech with its content synced to the Content Graph.
Install AlloyTech
Install, build and then run the demo site using the commands below. The first time you run the solution, you will be prompted to create an admin account. Once this is completed, you will have a site you can use for testing.
dotnet new epi-alloy-mvc
dotnet build
dotnet run
Install Content Graph
Follow the steps below to add and configure Content Graph in the AlloyTech demo site. You will need to contact Optimizely to gain access to an AppKey.
dotnet add package Optimizely.ContentGraph.Cms
1"Optimizely": {
2    "ContentGraph": {
3      "GatewayAddress": "https://cg.optimizely.com",
4      "AppKey": "",
5      "Secret": "",
6      "SingleKey": "",
7      "AllowSendingLog": "true"
8    }
9  }
Once installed and configured, you can then sync your content to the content graph using the scheduled job 'Content Graph content synchronisation job'. Content will also get synced when published.
Step 2 - Develop the site with Next.js
Creating a new site with Next.js is very simple, but take a look at https://nextjs.org/docs/getting-started for more detailed instructions.
npx create-next-app@latest --typescript
npm run dev
The site can now be accessed by typing 'http://localhost:3000/' in your browser.
Next.js doesn't include any GraphQL libraries, so I added the ApolloClient package for this.
npm install @apollo/client graphql
Recreating the Homepage
I want to produce a simplified version of the AlloyTech home page. I will render out the primary navigation along with the blocks from the main content area, this is analogous to the approach in the C# version of the page.
The page has no knowledge of where the data comes from this is handed via another step. It just uses the object send in the 'props'.
1type PageProps = {
2  page: any;
3  navigation: any;
4};
5
6function Home(props: PageProps) {
7  const { page, navigation } = props;
8  return (
9    <>
10      <Head>
11        <title>{page.MetaTitle}</title>
12        <meta name="description" content={page.MetaDescription} />
13        <meta name="viewport" content="width=device-width, initial-scale=1" />
14        <link rel="icon" href="/favicon.ico" />
15      </Head>
16
17      <MainNavigation navigation={navigation}/>
18
19      <main className={styles.main}>
20        <ContentAreaRenderer items={page.MainContentArea} />
21      </main>
22    </>
23  )
24}
Each Next.js page can include a 'getStaticProps' function, which is used during the build process to return the props used in the render. This is where we query the Content Graph to get the data for the home page (and navigation).
Note: 'getStaticProps' is just used for static site generation; a different method is called for server-side rendering.
1export const getStaticProps: GetStaticProps = async (context) => {
2
3  const httpLink = new HttpLink({ uri: process.env.GRAPHQL_HOST });
4
5  const client = new ApolloClient({
6    link: httpLink,
7    cache: new InMemoryCache(),
8    ssrMode: true
9  });
10
11  var { data } = await client.query({
12    query: StartPageQuery
13  })
14
15  var startPage = data.StartPage.items[0];
16
17  var { data } = await client.query({
18    query: NavigationQuery
19  })
20
21  var navigation = data.StartPage.items[0];
22
23  console.log(navigation)
24
25  return {
26    props: {
27      page: startPage,
28      navigation: navigation
29    },
30  }
31}
GraphQL query to get the home page.
1import { gql } from '@apollo/client';
2
3const StartPageQuery = gql`
4query MyQuery {
5  StartPage(locale: en) {
6    items {
7      Name
8      TeaserText
9      RouteSegment
10      MetaTitle
11      MetaKeywords
12      MetaDescription
13      MainContentArea {
14        DisplayOption
15        Tag
16        ContentLink {
17          Id
18          Expanded {
19            Name
20            ContentType
21            ... on JumbotronBlock {
22              Name
23              Heading
24              Image {
25                Url
26              }
27              ButtonText
28              ContentType
29              SubHeading
30            }
31            ... on TeaserBlock {
32              _score
33              Name
34              Image {
35                Url
36              }
37              Heading
38              Text
39            }
40          }
41        }
42      }
43    }
44  }
45}`
46export default StartPageQuery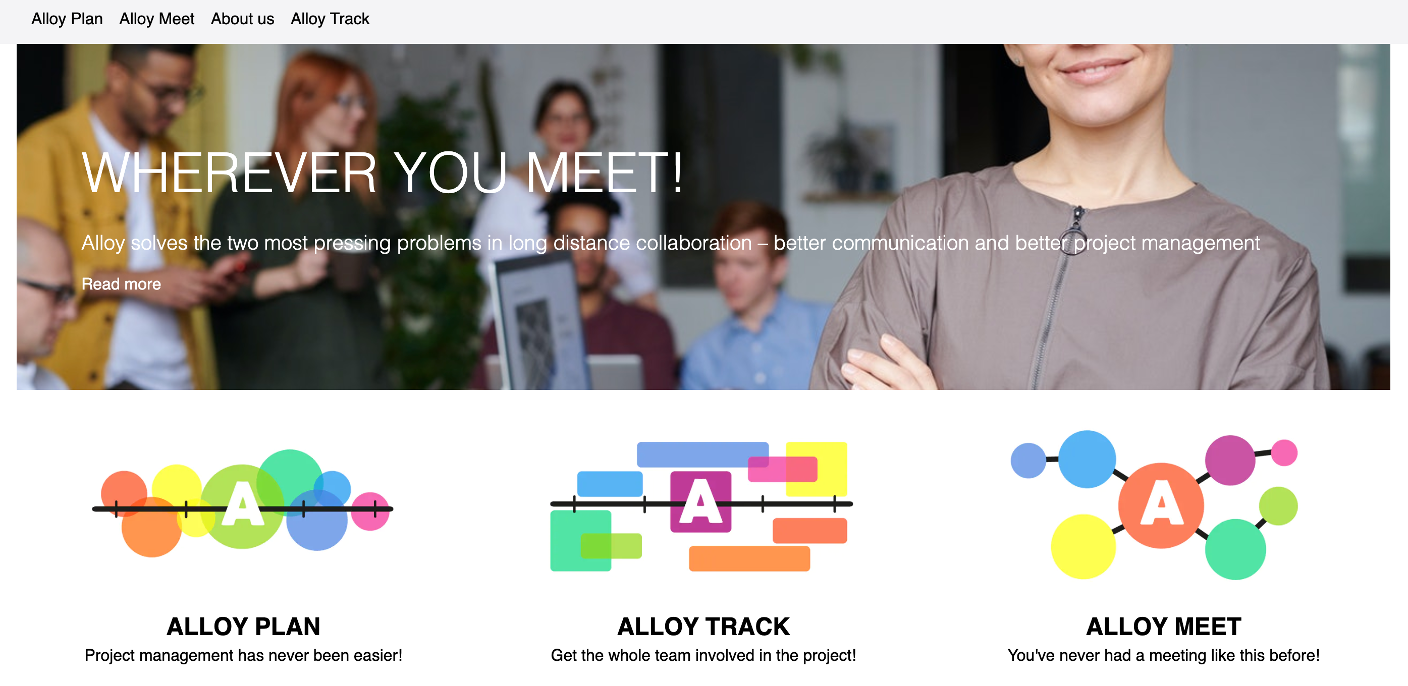
Product Pages
The home page is a simple example, but what happens when you have lots of content that uses the same template? In AlloyTech, there are 3 product pages accessed as child pages of the home page.
Routing
The naming convention of '[product-slug].tsx' signifies that the page is a dynamic route. The name within the square brackets '[]' is not important.
Next.js goes into more detail here: https://nextjs.org/docs/routing/introduction.
Generating the Routes
Much like the 'getStaticProps' function, Next.js has an approach for generating the routes, 'getStaticPaths'. This is also called at build time.
1export const getStaticPaths: GetStaticPaths = async () => {
2    const httpLink = new HttpLink({ uri: process.env.GRAPHQL_HOST });
3
4    const client = new ApolloClient({
5      link: httpLink,
6      cache: new InMemoryCache(),
7      ssrMode: true
8    });
9
10    var { data } = await client.query({
11      query: gql`query ProductPagesQuery {
12        ProductPage(locale: en) {
13          items {
14            Name
15            RouteSegment
16          }
17        }
18      }`
19    })
20    var pages = data.ProductPage.items;
21
22    const paths = pages.map((page: any) => ({
23      params: { slug: page.RouteSegment}, locale: 'en',
24    }));
25
26    return { paths, fallback: false };
27  };
Generating the page
'getStaticPaths' is responsible for building all the routes; each route will then be used to generate a single page, with the route data being passed to 'getStaticProps'.
1export const getStaticProps: GetStaticProps = async ({params}) => {
2
3  if (!params || !params.slug) {
4    return { props: {} };
5  }
6
7  const httpLink = new HttpLink({ uri: process.env.GRAPHQL_HOST });
8
9  const client = new ApolloClient({
10    link: httpLink,
11    cache: new InMemoryCache(),
12    ssrMode: true
13  });
14
15  var { data } = await client.query({
16    query: ProductPageQuery,
17    variables: {
18      segment: params.slug
19    }
20  })
21
22  var page = data.ProductPage.items[0];
23
24  var { data } = await client.query({
25    query: NavigationQuery
26  })
27
28  var navigation = data.StartPage.items[0];
29  return {
30    props: {
31      page: page,
32      navigation: navigation
33    },
34  }
35}
The following GraphQL query gets the specific page matching the route.
1import { gql } from '@apollo/client';
2
3const ProductPageQuery = gql`
4query ProductPageQuery($segment: String) {
5  ProductPage(locale: en, where: {RouteSegment: {eq: $segment}}) {
6    items {
7      Name
8      MetaTitle
9      MetaKeywords
10      MetaDescription
11      MainBody
12      TeaserText
13      RelativePath
14      PageImage {
15        Url
16      }
17      RouteSegment
18    }
19  }
20}
21`
22export default ProductPageQuery
Content Areas / Blocks
For this POC, I created my own Content Area Render as this is an Optimizely concept which requires custom development within your Next.js site.
The approach is straightforward; the content area renders iteratively over each item and uses a factory to determine the component to render. This factory also returns the display option, allowing blocks to be rendered at different sizes.
1function ContentAreaRenderer(props :any) {
2
3    let items :any[] = props.items;
4
5    var factory = new componentFactory()
6
7    return(
8        <div className={styles.container}>
9
10        {items?.map(i => {
11
12            const ContentAreaItem = factory.resolve(i);
13            const Component = ContentAreaItem.Component;
14
15            if (Component != null)
16                return (
17                <div className={ContentAreaItem.ItemClasses} key={i.ContentLink.Id}>
18                    <Component item={i}  />
19                </div>)
20            else
21                return null
22        })}
23
24        </div>
25    )
26}
The 'componentFactory' gets the correct component to render, and also gets the correct display option.
1class ContentAreaItem {
2    ItemClasses: string;
3    Component: any;
4
5    constructor () {
6        this.ItemClasses = "fullwidth"
7    }
8}
9interface Dictionary<T> {
10    [Key: string]: T;
11}
12
13class componentFactory {
14
15    components: Dictionary<any> = {};
16
17    constructor(){
18        this.components["JumbotronBlock"] = JumbotronBlock;
19        this.components["TeaserBlock"] = TeaserBlock;
20    }
21
22    getType(item: any) : string {
23        var contentTypes = item.ContentLink.Expanded.ContentType;
24        return contentTypes[contentTypes.length - 1];
25    }
26
27    getDisplayOption(item: any) : string {
28        return item.DisplayOption === "" ? "fullwidth" : item.DisplayOption;
29    }
30
31    resolve(item: any): ContentAreaItem {
32        var contentType: string = this.getType(item);
33
34        var i = new ContentAreaItem();
35
36        i.Component = this.components[contentType];
37        i.ItemClasses = this.getDisplayOption(item);
38
39        return i;
40    }
41}
Step 3 - Hosting the site with Vercel
Vercel is a platform for sites built using frontend frameworks. When your site is hosted with Vercel, you will automatically gain performance benefits due to the edge caching.
Deployment
Deploying your site with Vercel is extremely straightforward.
Create a new project and connect it to the GitHub repo, and configure the source location and the build pipeline. Every time the branch is updated, the code will be built and the site automatically deployed.
This approach has some real benefits:
Previewing all changes is simple. Each push to the repository triggers a build and generates a unique URL that can be shared.
It is possible to promote a previous version to 'Production', so rolling back simply involves clicking on a button.
Step 4 - Handling Content Changes
Static sites may deliver blistering performance, but produce challenges when content is modified; the changes are not reflected.
There are several strategies you can adopt to help solve this problem.
Per Request Revalidation
- It is possible to regenerate a page when a request comes in, but it is throttled so that an X number of seconds must have elapsed before the page can be regenerated.
On-Demand Revalidation
- You can expose an API endpoint that, when called, will regenerate the specific resource.
The problem with Per Request Revalidation is that we are moving from static generation to dynamic generation.
1import type { NextApiRequest, NextApiResponse } from 'next'
2
3type ErrorData = {
4  message: string
5}
6
7type SuccessData = {
8    revalidated: boolean,
9    message: string
10  }
11
12export default async function handler(
13    req: NextApiRequest,
14    res: NextApiResponse<ErrorData | SuccessData>
15) {
16    if (req.query.secret !== process.env.REVALIDATE_TOKEN) {
17      return res.status(401).json({ message: 'Invalid token' })
18    }
19
20    const { revalidatePath } = req.body;
21
22    try {
23      await res.revalidate(revalidatePath)
24      return res.json({ message: revalidatePath, revalidated: true })
25    } catch (err) {
26      return res.status(500).send({ message: 'Error revalidating :' + revalidatePath })
27    }
28  }
In the example above, I have exposed an API endpoint. The request body contains the path of the resource that needs to be invalidated. The 'revalidate' function then triggers regeneration of the page.
1public void Configure(IApplicationBuilder app, IWebHostEnvironment env, IContentEvents contentEvents)
2{
3        contentEvents.PublishedContent += ContentEvents_PublishedContent;
4}
5
6private void ContentEvents_PublishedContent(object sender, ContentEventArgs e)
7{
8        if (e.Content is IRoutable routableContent)
9        {
10            var url = UrlResolver.Current.GetUrl(e.ContentLink);
11
12            Task.Run(() =>
13            {
14                var request = new RevalidateRequest { RevalidatePath = url };
15
16                Task.Delay(10000);  // wait 10 seconds
17
18                var r = client.PostJsonAsync<RevalidateRequest>("/api/revalidate/?secret=...", request);
19
20                Task.WaitAll(new[] { r });
21            });
22        }
23}
The C# code above demonstrates how the Optimizely website triggers the revalidation in the static site. I have built in a 10 second delay as you need to allow for the content to be synced with the content graph.
Closing Thoughts
Whilst you are unlikely to reproduce model your content as you would in a normal Optimizely website, this POC does demonstrate the core concepts of using Optimizely as a headless CMS.
Performance Benefits
Whilst not the most scientific of comparisons, the two lighthouse reports below demonstrate the performance improvements you can gain when moving to a statically generated approach.


Next Article
In the following article, I will be looking into using Optimizely in a more headless mode and will also demonstrate other features such as searching, content listing, etc.
Examples
You can access the POC source code at my GitHub Account, and the static site at https://graph-ql-three.vercel.app/.